Notebooks workshop
Live workshops take place in Prague, Czech Republic.
Next places & dates will be announced here. For inscriptions, please send an e-mail at info@gratefoolmood.com. All materials are included in the price of the workshop. The number of participants is limited. More details here.
Upcoming dates - stay tuned!
In the mood to do it at home? Here is how!
There is a wide variety of notebooks you can create with this technique. First, close your eyes and imagine how yours would look like. Choose from the list below.

- material (paper or leather)
- binding models


 and many more.
 - colour of the covers
- colour of the thread
- acrylic paint design/logo - have your own logo? here is how we'll make it!
- notebook thinckness - usually between 60-100 sheets
What you need
- paper - 19,5cm/15cm; 60-100 sheets white or coloured;
- strong paper clips
- cardboard (260-300g/mp paper) coloured 19,5cm/15cm, 2 pieces OR a piece of leather - 19,5cm/31cm
- drilling machine for the holes in the paper
- textile thread ~ 1mm thick and needle for binding
- leather needle and sharp cutter if you use leather
- pen
- acrylic paint, plastic sheet and sponge for the logo
Ready to make your own notebook? Let`s take a look below.
1. Prepare the paper
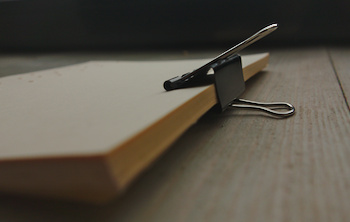
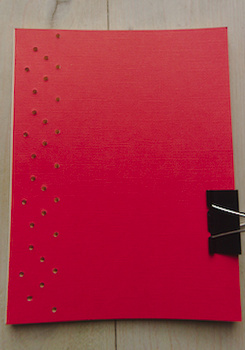
For this you need 19,5cm/15cm sheets of paper. Cut your A4 sheets in any copy shop! Take a batch of ~60 pieces and clip them together with strong paper clips. Leave the clips in place until the notebook is done!
2. The binding model
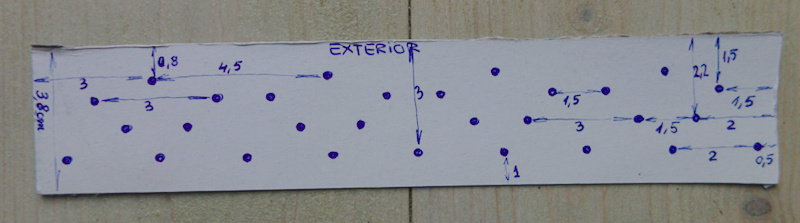
Take a piece of cardboard 19,5cm/3,8cm and make holes in it respecting the dimensions from the model below. All numbers represent cm. The holes are spaced evenly. This example is for this binding model; For more binding models, click here.
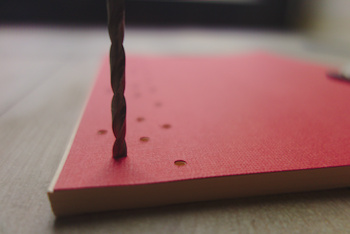
3. Make the holes
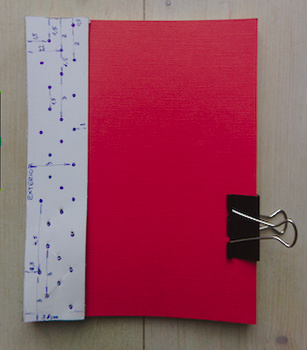
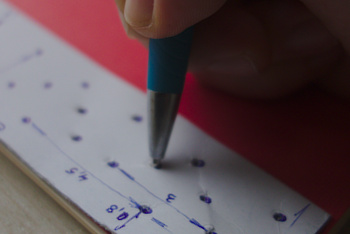
Put the cardboard that you just made, on top of the paper batch. Make sure to put it the right way! The exterior sign, should be towards the edge of the paper batch. Use the pen to make signs for each hole. Then, drill the holes with your drilling machine. You need 3mm-4mm holes, so use a small, paper drill. If you will use cardboard covers for your notebook, add them aswell to the batch of paper before making the holes.
4. The covers
If you use cardboard covers, they are already prepared, from the step above.
If you use leather, cut it with a cutter (19,5cm/31cm) and put it on the batch of paper, and use additional strong paper clips to keep it in place. Attach one side, and then the other. Make signs for each hole, with a pen, on each side of the leather. Now, remove the clips and make holes in the leather with the needle.
5. The binding
Put the thread in the needle and start binding, as described in the pictures below. Each step is represented in numbers. Start with "1". For even numbers, push the needle from one side of the notebook and for odd numbers, from the other side. If you respect this, you can't fail.
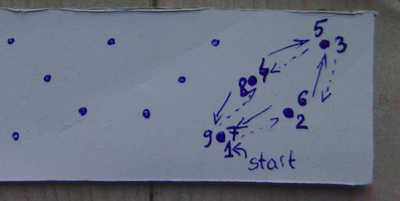

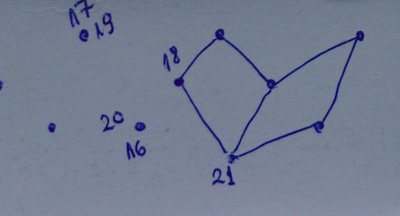

Now one flower is done. Repeat the steps above for the other three.
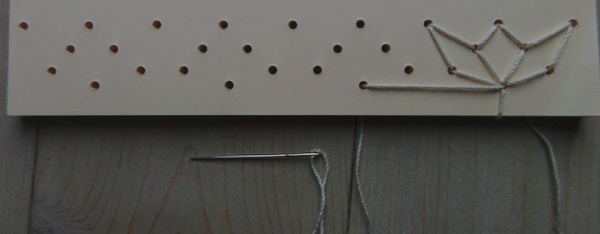
At the end, make a knot, as close to the cover as possible, and push it into the hole, with a pen.
6. The logo
Cut the shape of the desired logo in a plastic sheet. Put the plastic on the notebook and apply the acrylic paint with a sponge.
Congratulations! Your notebook is now ready!
