Self-rescue in climbing
Climbing is one of the best sports out there.. Nothing compares to conquering those magnificent rocks in the heart of the mountains, surrounded by marvelous views. But engaging in a multi-pitch route can end up in unpredicted situations. Take a look below at some undesirable scenarios along with a couple of self-rescue techniques.
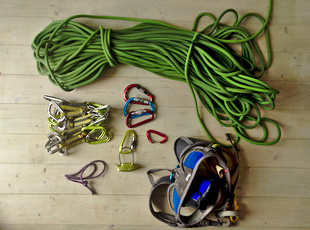
Before even starting with the unpredictable situations, here are some of the most important things to check before starting a long climbing route:
- take enough locking carabiners
- pack a headlamp
- take extra slings and cord
- pack warm clothes and water
- don't forget your cellphone
- don't start climbing too late
- check the weather
- choose one or two grades below your limit if you climb a very long route
Now let's see what can happen...
1. Dropping the belay device
This is one of the most frequent "accidents" that can happen in the middle of the wall. After arriving to the anchor point, the belay device gets lost in the void beneath. How are you going to belay your partner?
Option one
The Munter hitch (Cabestan knot)
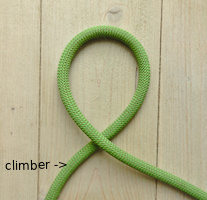
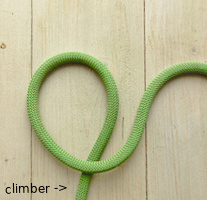
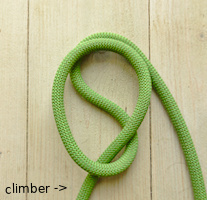
- Advantages: it's a simple knot, you just need one hand and one carabine
- Disadvantage: high friction and torsion of the rope
Option two
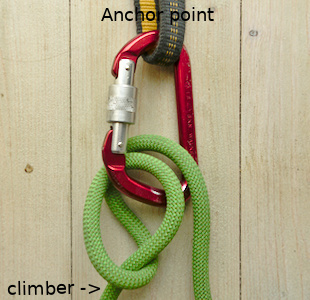
The Garda hitch (auto-locking)
Make sure your partner is attached to the locking end (the one at the right side, which will be on top, squeezing the other end under the weight of the climber).


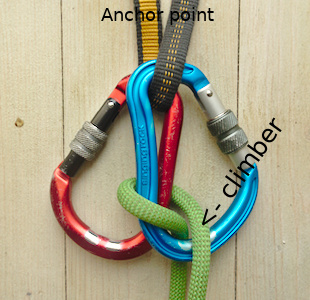
- Advantages: auto-locking (in case of a fall, the climber's end squeezes the other end of the rope, making the sliding of the rope impossible)
- Disadvantage: two similar carabiners; requires experience to tell which end will run freely when pulled;
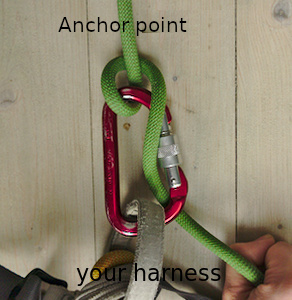
2. Belaying from the anchor without a device
You dropped the belaying device, but of course, you still want to continue climbing. Your partner will lead the next pitch. How will you belay him, without a device?
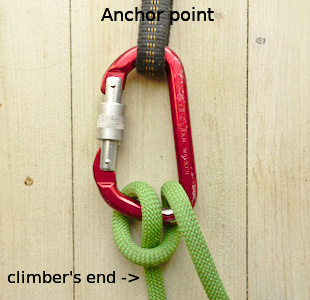
Use the same Munter hitch, like this:
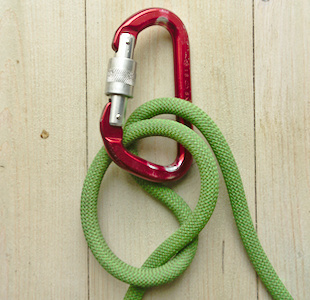
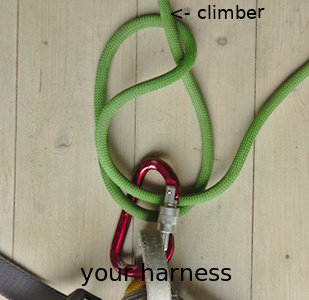

Note: Of course, you are attached to the anchor point, with your sling.
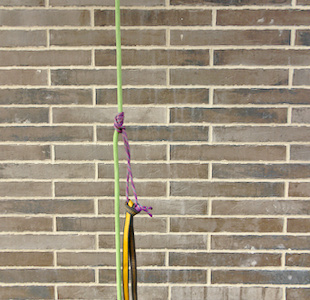
3. Ascending a rope
In the middle of a big wall, there is an overhang. Your partner belays you from the top, but you are tired and fall in the middle of the pitch. You are now far from the wall, with no possibility to reach the rock. How are you going to continue?
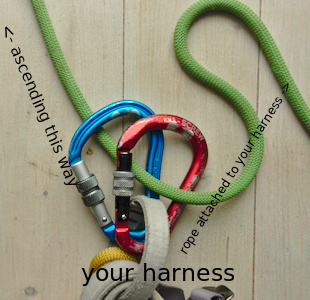
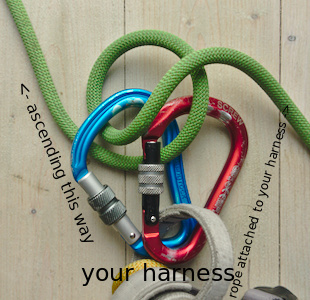
There are three more pitches, so you need to ascend the rope as fast as you can and without using too much energy. For that, you need two auto-locking points: one for your harness and one that will serve as "ladder".
3.1 "Slide and grip" or one-direction-load knots
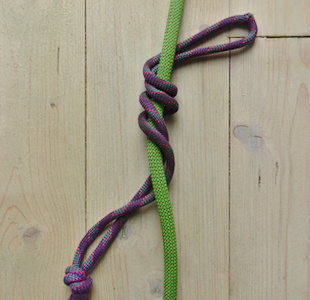
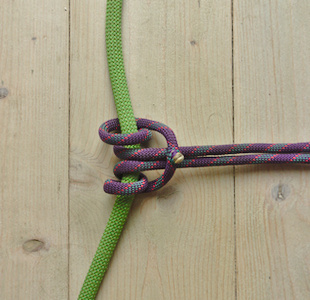
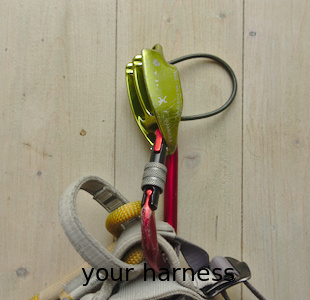
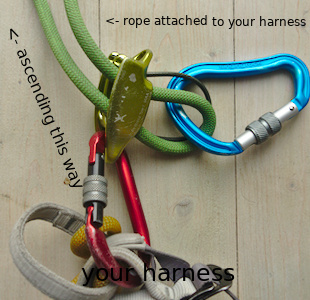
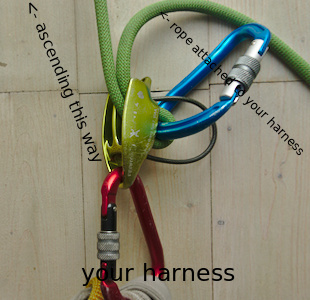
The Klemheist knot
Advantages: easy to release knot, even while loaded
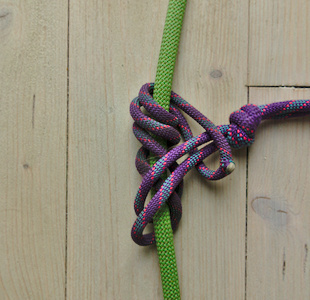
The Prusik knot
- Advantages: easy, symmetrical knot
- Disadvantage: non-releasable while loaded

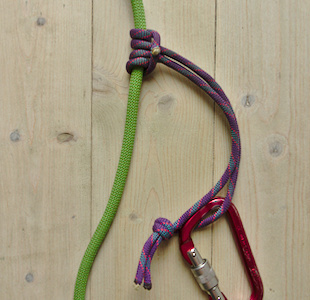
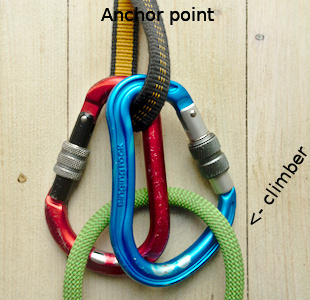
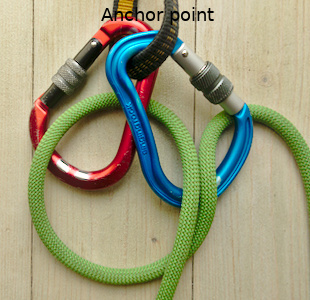
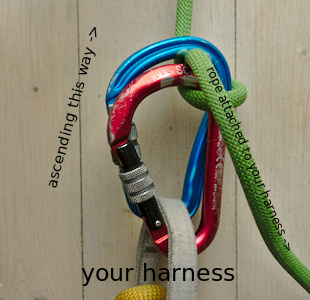
3.2 Garda hitch
- Advantages: auto-locking
- Disadvantage: you need two (similar) carabiners;

3.3 **Using the belay device - if you have one
3.4 Using the knots above to ascend the rope
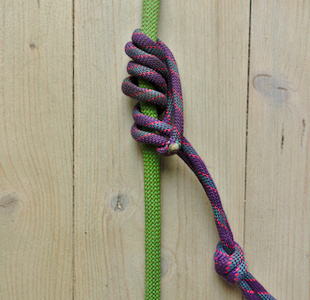
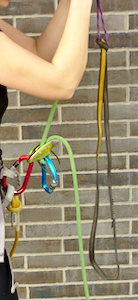
Make a "slide and grip" knot (Klemheist or Prusik) on the rope and attach a sling to it: that will be your ladder.
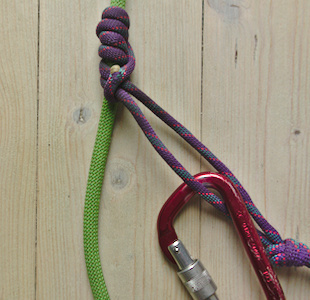
Underneath, make a second locking-system, this time - attached to your harness with a carabine. Choose any of the three techniques described above (Klemheist, Garda or Belay device).
Note: If you choose the Garda hitch or the Belay device, you will need to "install" them while stepping onto the ladder, in order to un-load the rope!
- Now step onto the ladder, ascend the knot attached to your harness, load it, slide the ladder knot upwards and step again into the ladder. Repeat until you reach the rocks or the anchor point.

Note: For clarity, in the pictures above, I didn't get attached to the end of the rope, like I would normally be - in a climbing route;
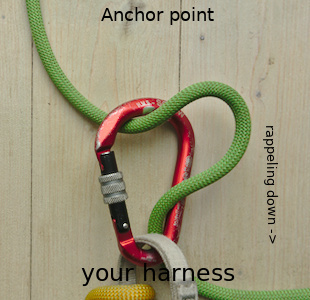
4. Rappelling
Once you are up, you will need to come down. How are you going to do that without the rappelling device? Here are some suggestions.
Note: For clarity, in the pictures below, I am single-strand-rappeling, using the biner rope block technique, but the knots work exactly the same for the classical double-strand rappel.
4.1 The Munter hitch (Cabestan knot) - see pictures above
- Advantages: it's a simple knot, you just need one hand and one carabine
- Disadvantage: high friction and torsion of the rope, especially for double-strand rappel!; in double strand rappel, the knot is big and the descend is slow;
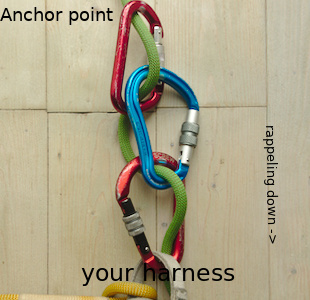
4.2 Using carabiners
Make a chain of steel carabiners, like this:
- Advantages: no "rope-on-rope" friction or torsion; the double-strand rappel is much more smooth;
- Disadvantage: carabiner friction (use steel carabiners!)


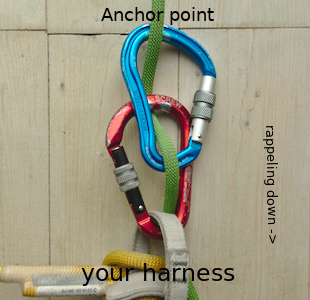
If you need more friction - add carabiners, like this:
Last but not least..
Unlike in the pictures above, don't forget to always lock your carabiners!
Don't use damaged equipment.
Test and get used to all the methods above, in a safe environment, before using them in real-life situations.
Always double-check your actions and cross-check your partner when possible.
Happy climbing!
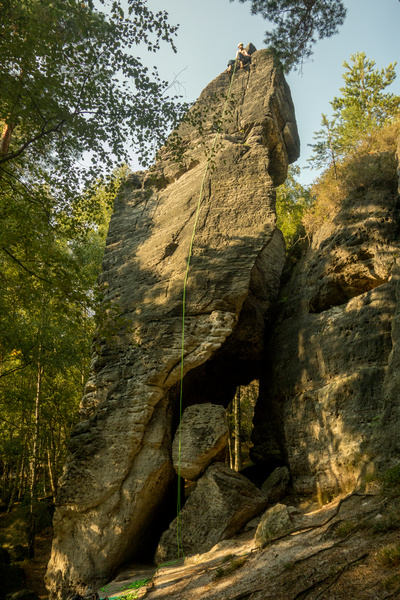
Picture from Ostrov, Czech Rep., route: "Old route to Kacha"